E-bike Repairs
Years ago I purchased a poor-quality E-bike to ride trails, which gave me more problems than it did enjoyment. Even though it was constantly broken and needed to be fixed, the knowledge I gained repairing it greatly helped me develop my engineering skills and hobbies. The photo shows how the bike frequently looked.

One of the worst problems with this bike was when the hub motor mounting failed, ripping apart wires and shorting the Hall sensor wires to the phase wires. This damaged the controller, the temperature sensor in the motor hub, and all six Hall sensors (two sets of three).

Since I didn't know the severity of the problems yet, I first took out the controller and started to dismantle it.
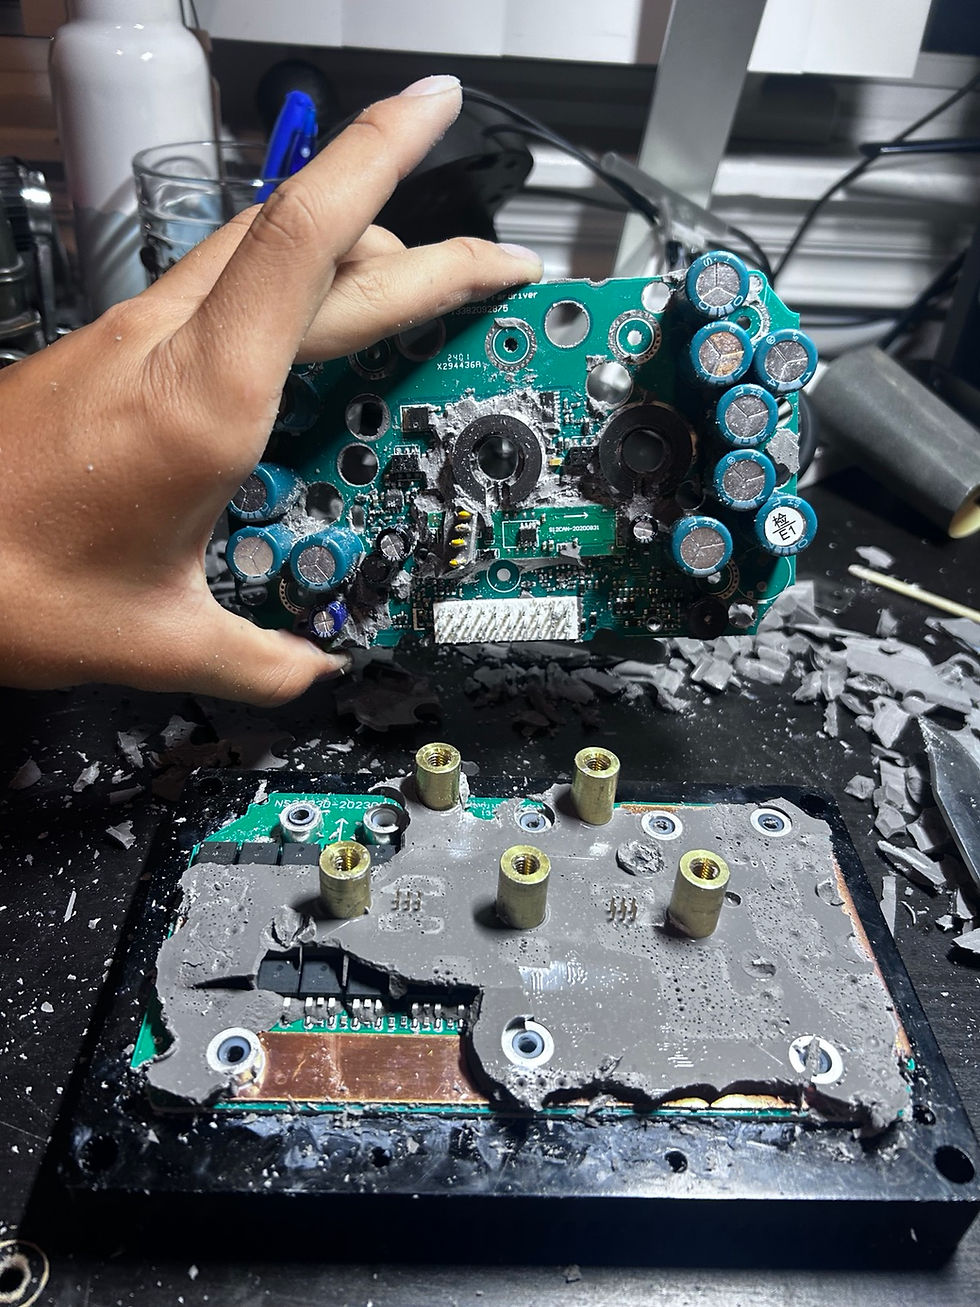
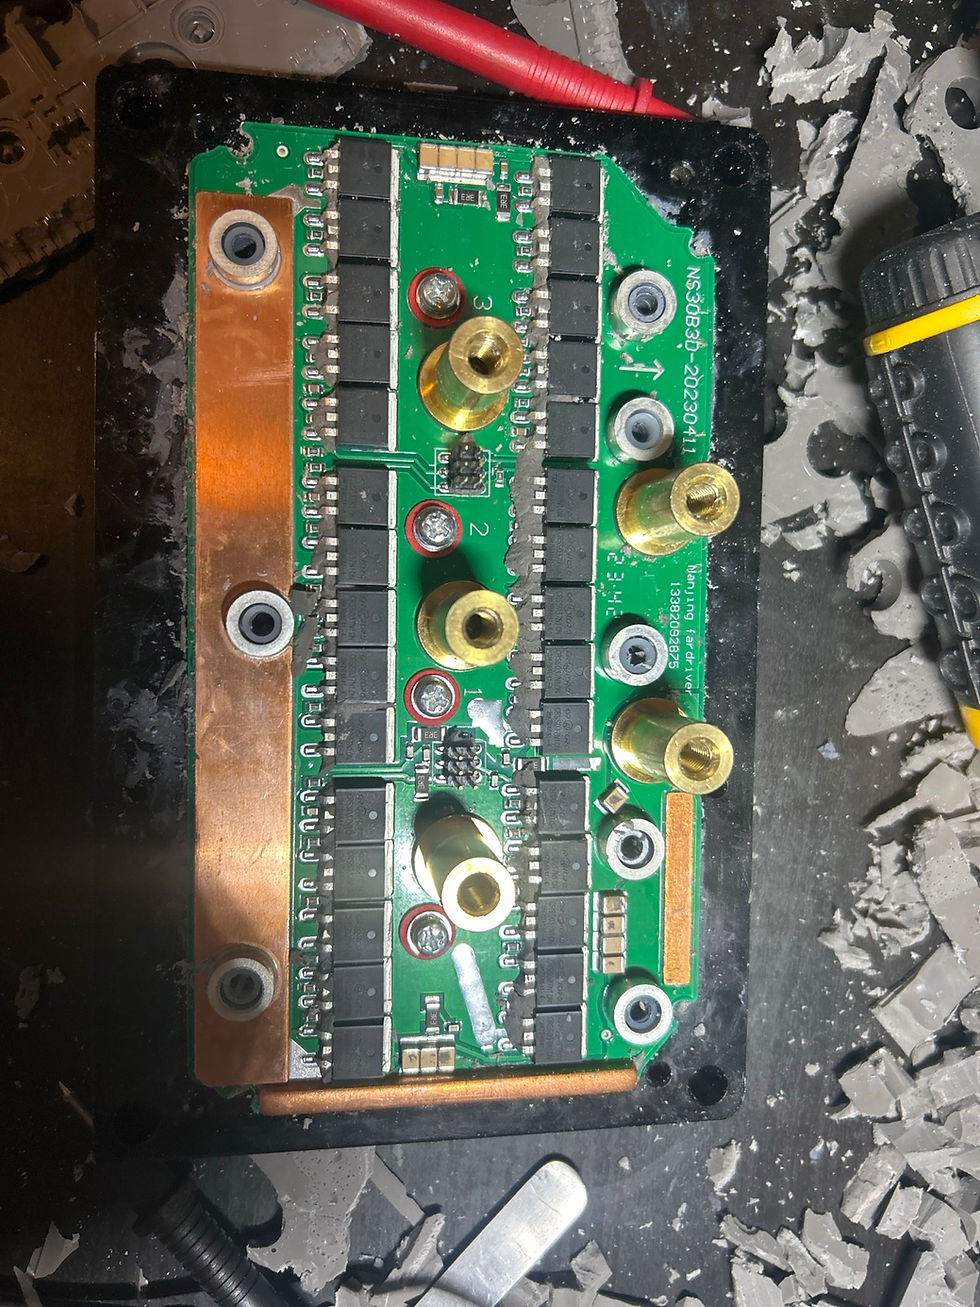
Motor controllers are commonly potted to protect the circuit from moisture and vibration. However, this makes repairs hard since the compound has to be scraped out.


I began testing every CRSS037N10N MOSFET, resistor, and capacitor with a multimeter; all appeared to be in working condition in these checks. The controller still produced incorrect power outputs when operated. This suggested a fault elsewhere in the circuit, but the multimeter checks did not isolate a specific failed IC. I replaced the controller. This still did not solve the issue.

The Honeywell SS413F bipolar Hall sensors were also damaged. Thankfully, they were inexpensive, at $0.2619 each. I ordered the minimum quantity of 15 units and installed them in the motor after chiseling out the old glued sensors. Hall sensor feedback matters for motor startup and low-speed control.

*I have since upgraded to a much more capable Fluke 87V multimeter
I repaired the hub motor, made a custom wiring harness, and installed a new controller. Before operating the bike, I needed to configure the controller for the BMS, battery, motor, and wire gauge. Since the controller uses a serial protocol, I needed a UART connection to communicate with it. Instead of purchasing a dedicated cable, I used an ESP8266’s RX/TX ports.
The bike was repaired successfully. The work taught me to trace faults across a complete system rather than stop at the first damaged component.
On top of the electronic issues, the bike was badly damaged mechanically. Custom torque arms were manufactured and installed using SLM technology. The Chicago bolts on the suspension linkage had sheared and were replaced with a shoulder bolt and nylon lock nut. I also welded the broken frame. At the end of the day this bike taught me a lot of new skills, so all of those late nights of work had their purpose.